
What to Expect on Your First Cruise: A Guide to Smooth Sailing

Cruise-ready and excited—this couple is about to embark on their first cruise adventure.
Before You Sail – Booking, Docs and Prep
Booking your first cruise is exciting—but it can also feel a little overwhelming. Here’s what to expect before you even step on the ship, so you can plan with confidence and cruise like a pro from day one.
Choosing the Right Cruise for You
Your first cruise experience starts with choosing the right match. Cruise lines vary in atmosphere, amenities, and overall vibe. If you’re looking for laid-back luxury and elegant service, consider lines like Celebrity, Princess, or Holland America. Prefer action-packed fun with a wide range of activities? Royal Caribbean, Carnival, or Norwegian might be more your speed.
But beyond the cruise line, there are a few key decisions that can shape your entire experience:

Planning your cruise is part of the fun—get excited as you explore options together online.
Key Things to Consider:
Length:
Short 3–5 day sailings are great for testing the waters. But if you really want to unwind and explore multiple ports without feeling rushed, a 7-night cruise offers the best balance.Departure Port:
Can you drive to port (and save on airfare), or will you need to fly in? If flying, consider arriving a day early to avoid travel-day stress.Ship Size:
Mega-ships feel like floating cities—full of dining options, shows, and crowds. Midsize ships often have a more relaxed pace, easier navigation, and a quieter atmosphere, which many grown-up travelers prefer.Destinations & Climate:
Think about the destinations you’re most excited to visit—do you want sunny beaches, historic cities, or lush island escapes?Then consider the best season to visit those spots:
Peak Season offers the best weather but higher prices and bigger crowds.
Shoulder Season (just before or after peak) often means better deals with milder weather and fewer people.
Off-Season can be budget-friendly, but some ports may be rainy, hot, or even closed.
Example: Want a Caribbean cruise with perfect beach weather? Late winter to early spring is ideal. Looking at Alaska? You’ll want to sail May through September.
Sea Seeker Tip: Think about what kind of experience you want—festive and bustling or quiet and scenic—and choose your itinerary and season accordingly.
Getting Your Travel Documents in Order
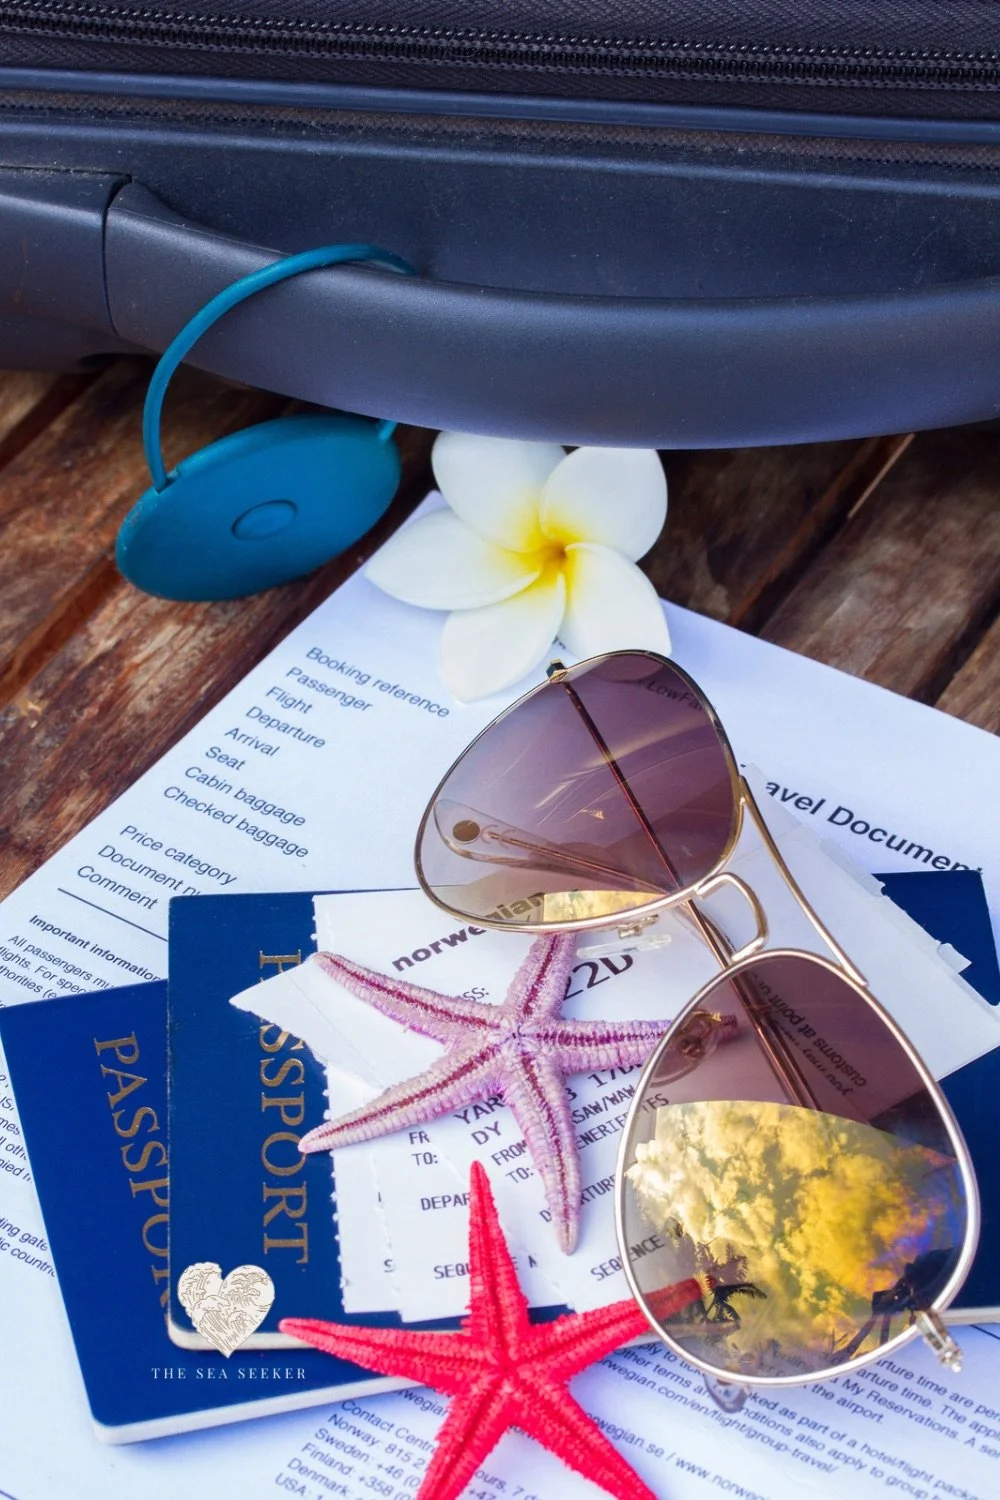
PRO TIP:
Print two copies of everything—one for your carry-on and one to leave in your cabin. And don’t forget to save digital versions on your phone or cloud storage just in case.
Cruise lines require specific documents based on your destination:
Closed-loop cruises (starting and ending at the same U.S. port) typically allow a state-issued birth certificate and government-issued photo ID—but a passport is strongly recommended for flexibility, emergencies, and peace of mind.
International cruises (those visiting foreign countries or starting/ending outside the U.S.) require a valid U.S. passport with at least six months’ validity beyond your return date.
If you’re flying to your cruise port, even for a domestic sailing:
You’ll need a REAL ID-compliant driver’s license or another TSA-approved form of ID (like a passport) to clear airport security.
Beginning May 7, 2025, TSA will require a REAL ID to board domestic flights. Look for the star on your license—or upgrade if you don’t see one.
Other travel papers to bring:
Boarding pass and luggage tags (usually available via the cruise line app or online check-in)
Travel insurance documents (optional but highly recommended)
Any required visas (uncommon for Caribbean cruises, but always double-check)
Printed receipts for shore excursions, spa treatments, drink packages, and Wi-Fi plans—especially those booked before your cruise.
Understanding Cruise Lingo
Some terms you’ll see a lot:
Embarkation = boarding the ship
Disembarkation = leaving the ship at the end of your cruise
Port Day = a day spent at a destination
Sea Day = a full day at sea with no port stop
Muster Drill = safety briefing required for all passengers
Tender = a small boat used when the ship can’t dock at the pier
Don’t worry—by Day 2, you’ll sound like a seasoned cruiser.
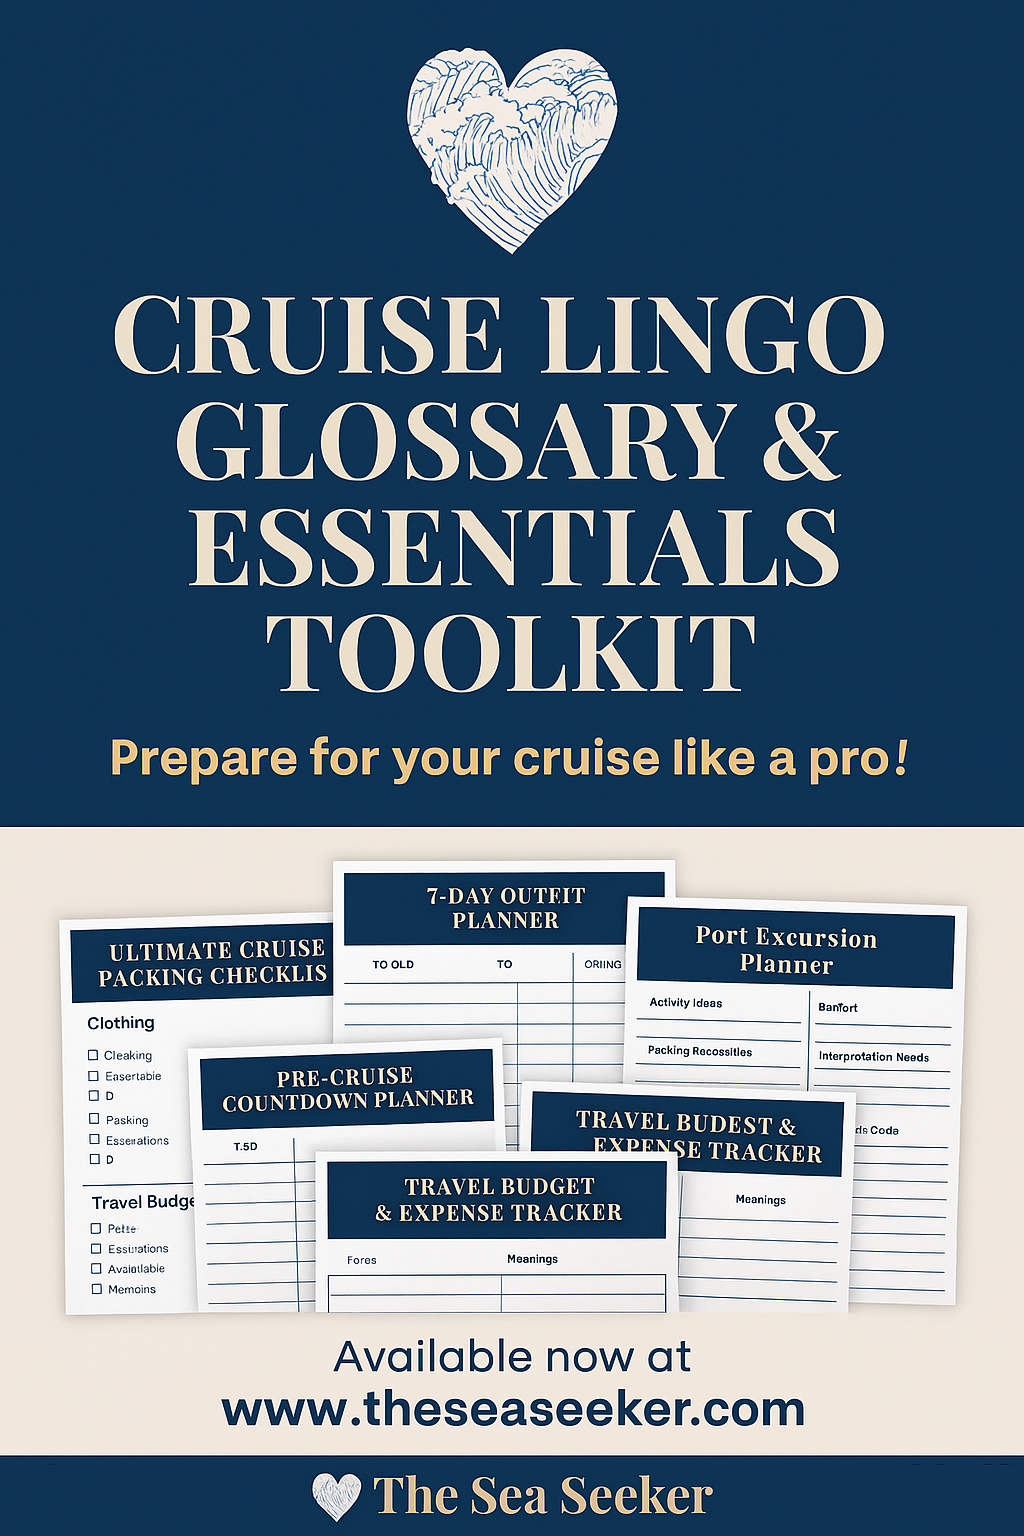
The Sea Seeker’s Cruise Essentials Toolkit: everything you need to cruise smarter and pack with confidence.
Prep and Packing: What to Do Before You Go
There’s a reason seasoned cruisers start prepping weeks in advance. You’ll want to:
Download the cruise line’s app – It’s essential for daily schedules, dining reservations, and even messaging onboard.
Check dress codes – Some ships still have “elegant nights” or theme parties.
Research shore excursions early – popular tours fill up quickly.
Start packing using our Ultimate Cruise Packing List and Cruise Outfit Planner.
Book excursions ahead of time. Two good reasons: 1) You can often find sales or bundle deals when booking early, and 2) popular excursions do sell out, especially beach clubs, snorkeling tours, and cultural experiences.
Pre-book drink packages, Wi-Fi, and spa treatments. Cruise lines often offer a discount when you purchase these add-ons before sailing, compared to onboard pricing.
Carry-on rules for drinks. If your cruise line allows you to bring canned soda or a bottle of wine, it typically must be in your carry-on. If packed in your checked bag, it may be confiscated or break during transport.
Leave digital and paper copies of your passport, ID, insurance, and travel itinerary with a trusted emergency contact—just in case.
Download movies, music, and eBooks before leaving home, as ship Wi-Fi may be too slow or costly for streaming.
Want a shortcut? The Cruise Essentials Toolkit includes our must-have planning guides, packing checklists, and more. Grab yours here.
Embarkation Day – What Actually Happens
Your cruise countdown is over—today’s the big day! But before you’re sipping a drink by the pool or exploring your cabin, there’s a process to get from curbside to cruise life. Here’s exactly what to expect so your embarkation day is smooth, not stressful.

From airport arrivals to portside hotels, your transportation plan sets the tone for a smooth cruise start.
Getting to the Port
Whether you’re driving in or flying, timing is everything.?
Most ports offer secure parking lots or garages (for a fee), usually within walking distance or a quick shuttle ride to the terminal. Expect to pay anywhere from $15–$25 per day, depending on the port.
Flying in?
If you’re flying to your cruise city, consider arriving at least one day early. Cruise ships wait for no one—flight delays can mean missing the boat (literally). Many cruisers book a pre-cruise hotel with a shuttle service to the port for extra peace of mind.Ride-share or hotel shuttle?
Most port cities offer Uber/Lyft or dedicated shuttles. Just be ready for some terminal traffic during busy embarkation hours (usually 11 AM–2 PM).
🧳 Sea Seeker Tip: As you arrive, porters will take your large luggage curbside and deliver it to your stateroom later. Be sure your luggage is tagged with the cruise line-provided luggage tags, and keep essentials (meds, documents, sunscreen, swimsuit) in a carry-on or backpack with you.

Cruise tip: Always pack your essentials in a carry-on bag when flying to port.
Security and Documentation Check
Once inside the terminal, the process is similar to airport security, but usually faster.
Here’s what typically happens:
Check-in with cruise staff (you’ll need your boarding pass, ID/passport, and credit card if you haven’t set up your onboard account)
Security screening – carry-ons go through an X-ray machine, and you’ll walk through a scanner
Photo taken for your onboard ID (often linked to your keycard or cruise app)
Leave behind: Liquor, open drinks, irons, and certain electronics may be confiscated—check your cruise line’s prohibited item list beforehand.
The Boarding Process: Step by Step

The calm before the cruise: a quiet gangway ready to welcome guests onboard.
Once checked in, you’ll either:
Walk right on board if it’s your arrival window, or
Wait in the terminal until your group is called (usually 15–45 minutes)
When it’s your turn:
You’ll walk through a gangway onto the ship.
Staff will welcome you aboard (sometimes with music or champagne!).
Your vacation officially begins—and yes, it’s okay to smile like a kid on Christmas morning.
Sea Seeker Tip: The earlier you board, the more time you have to explore the ship before it gets crowded. Most staterooms aren’t ready until around 1:30–2:00 PM, so plan to roam for a bit with your carry-on.
First Things to Do Onboard

Pizza wth a view.
Once you’re on the ship, resist the urge to overthink it. Here’s a smart first-day flow:
Find lunch: Head to the buffet, poolside grill, or main dining room. Some ships have embarkation-day dining secrets—like special sit-down lunch spots that are less crowded.
Tour the ship: Grab a map or use the app to orient yourself. Walk from bow to stern and get a feel for where everything is—pools, dining rooms, spa, theater, bars.
Make reservations: Specialty dining, spa appointments, and show tickets can book up fast. Knock those out early if you have your heart set on something.
Sign up for the Wi-Fi plan (if you’re getting one) and download the ship’s app for daily schedules and updates.
Complete the muster drill (safety briefing). This is required before the ship sails and usually takes place around 3–4 PM. Many cruise lines now allow you to watch a short video and check in at your assigned station.
Keep your printed boarding pass handy for check-in and any early onboard purchases until your cruise card is issued.
Download the cruise line app before you board. It will help with check-in, reservations, daily schedules, and more.
Switch devices to airplane mode immediately to avoid high roaming charges.
Optional but fun: Don’t miss sailaway from the top deck. Grab a cocktail, find a lounger, and enjoy the music as your ship pulls away from the port and your vacation truly begins.

Welcome aboard! Embarkation day is full of excitement—explore the ship, grab a bite, and soak in your first moments at sea.
Your First Day Onboard – Settling In
Once you’ve boarded the ship and had your first bite to eat, the excitement really starts to sink in—you’re officially on vacation. But that first day can feel like a blur if you’re not sure what to expect. Here’s how to ease into your cruise and make the most of your first few hours on board.
Your Stateroom: When It’s Ready and What to Expect
You probably won’t be able to access your stateroom right away. Most cruise lines open staterooms between 1:30 and 2:00 PM, depending on how quickly they’ve been cleaned and reset from the previous cruise.
In the meantime:
Keep your carry-on bag close with essentials like medications, chargers, sunglasses, and anything you’ll need until your luggage arrives.
If you’re wearing travel clothes, you may want to change into cruise-friendly attire once your cabin is ready—think lightweight layers and comfortable shoes.

A closer look at what to expect in your cruise cabin—organized, compact, and functional.
When your room is open:
Your stateroom keycard will either be handed to you at check-in, waiting at your cabin door, or accessed through the cruise line app.
Your checked luggage will arrive later in the day—sometimes not until dinner. Be patient and kind to the hardworking porters.
Most suitcases fit under the bed—freeing up closet space for a clutter-free cabin.
Cabin walls are metal, so bring magnetic hooks to hang hats, towels, or lightweight bags.
An over-the-door shoe organizer in the bathroom keeps toiletries and daily essentials tidy in small spaces.
Bring a foldable bag for souvenirs or extra clothes picked up along the way.
Bring a light sweater—the indoor areas can be cool, even in tropical climates.
A reusable cup is handy for bringing water or tea back to your cabin at night.
Sea Seeker Tip: Give your room a quick once-over when you arrive. If you need extra pillows, hangers, or ice, your room steward is just a call—or a quick hallway wave—away.

Look for deck plans near the elevators.
Finding Your Way Around the Ship
Cruise ships can be a bit disorienting at first—especially larger ones that span over a dozen decks with multiple dining venues, pools, lounges, and theaters.
To get your bearings:
Use the deck maps posted near elevators or your cruise line’s mobile app.
Explore from top to bottom—or choose one floor and walk it end-to-end to discover hidden gems like coffee bars, adult-only areas, or cozy observation lounges.
Pay attention to landmarks like atriums, artwork, or staircases with color-coded carpeting (some cruise lines use this to mark port vs. starboard).
Pro Tip: If you get turned around, just ask a crew member. They’re used to helping first-timers and are usually more than happy to assist.

Don’t skip muster drill.
Safety First: The Muster Drill
The muster drill is a required safety briefing for all passengers—yes, even repeat cruisers. Here’s what to expect:
cruise lines now offer a modernized version of the muster drill. You can watch a short safety video on the cruise app or in your stateroom.
You’ll still need to check in at your assigned muster station, which is usually located on your keycard or the back of your cabin door.
It takes less than 10 minutes, but it’s mandatory—and the ship can’t sail until every passenger checks in.
Sea Seeker Tip: Don’t delay your muster check-in. Lines build up close to sailaway time, so knock it out early and enjoy the rest of your day stress-free.Optional Activities (or Just Relax!)
Once you’ve eaten, unpacked your carry-on, and completed the muster drill, you’ve got a few golden hours to enjoy before dinner. Use that time however you please:
Join a ship tour or explore at your own pace
Register for spa services, kid/teen clubs, or fitness classes (if traveling with family)
Visit the main dining room to confirm your table assignment or request a change
Check out the daily schedule for welcome events, raffles, or sailaway parties
Find your favorite spot—whether that’s the pool deck, a shady lounger, or the nearest bar with ocean views

Get to the loungers early on sea days—these sun-soaked spots are prime real estate on any cruise ship.
Onboard Money, Tipping and Budgeting
One of the biggest surprises for first-time cruisers? You’re technically on a cashless floating city—and that can make it easy to lose track of what you’re spending. Let’s break down how onboard money works, what’s included in your fare, and how to keep your budget in check.
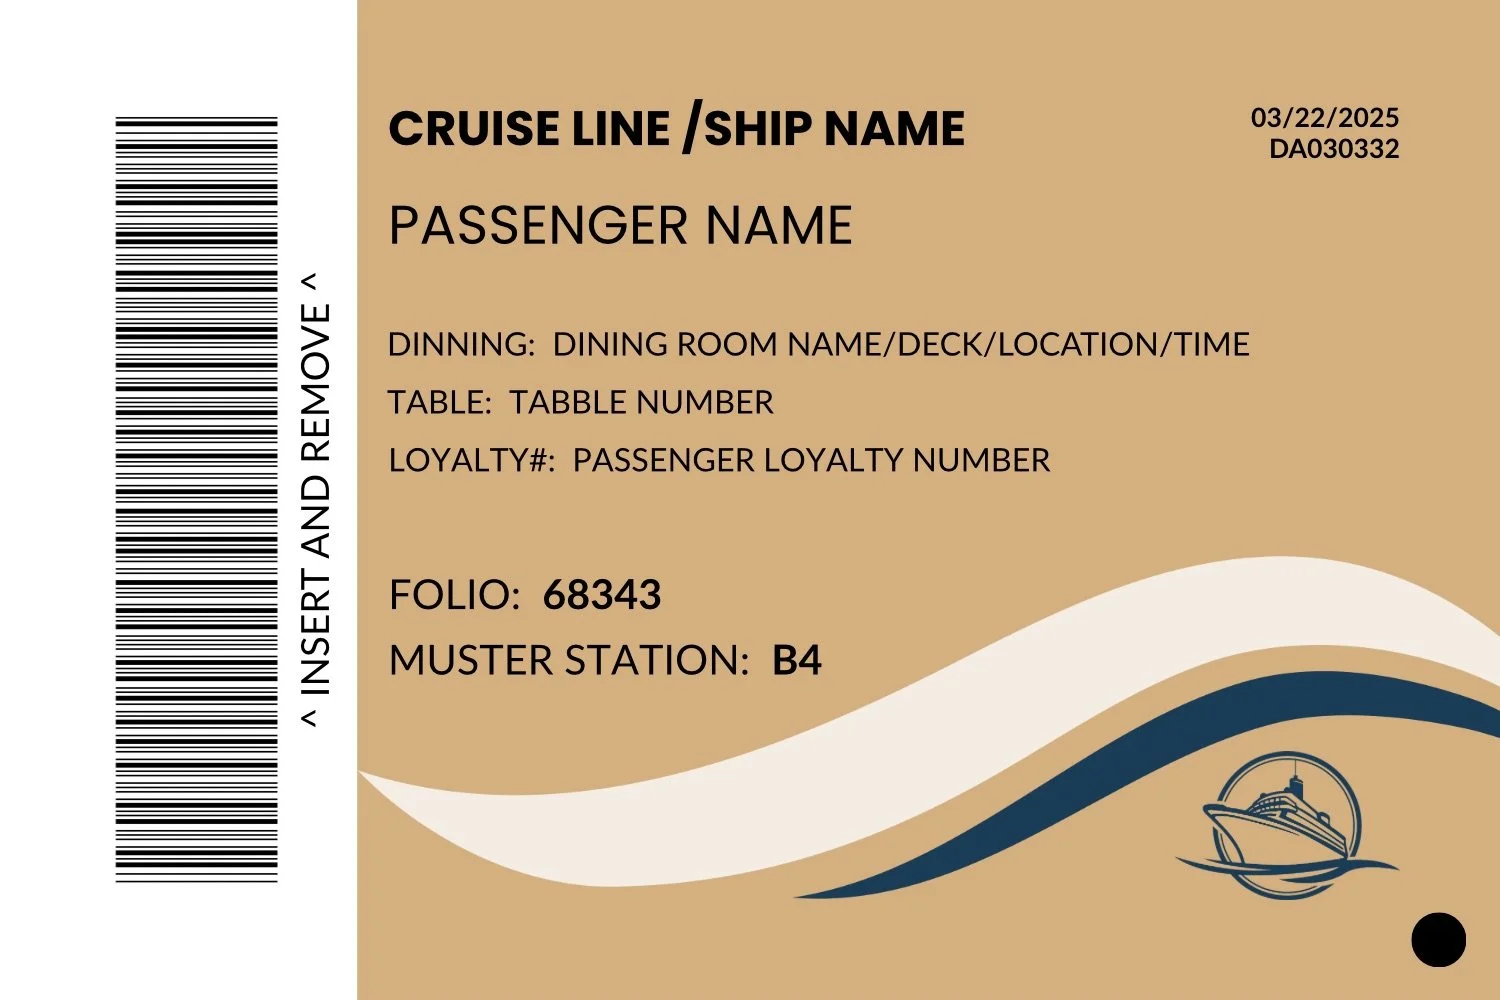
Your cruise card holds key info: muster station, dining location, and folio number—don’t board without it.
Your Onboard Account: SeaPass, Sail and Sign, or Medallion
When you board your ship, you’ll be given a cruise card (or digital medallion) that acts as:
Your room key
Your onboard credit card
Your ID for getting on/off the ship at ports
You’ll link a credit or debit card to your onboard account during online check-in or at the terminal. All purchases—drinks, spa treatments, souvenirs, shore excursions—will be charged to this account throughout your cruise.

Avoid post-cruise surprises—credit cards are typically better than debit for onboard accounts due to holds.
Important Note About Debit Cards:
If you use a debit card, the cruise line will often place a hold on your bank account—anywhere from a few hundred dollars to the total amount you end up spending onboard. These holds may not be released immediately after your cruise and can remain in place for several days until the cruise line settles charges with your bank.
Some travelers have been caught off guard by this, especially when trying to pay bills or use funds right after vacation. If you can, use a credit card for smoother transactions and to avoid unexpected freezes on your checking account.
Travel-Smart Tip:
Call your bank and credit card companies before your cruise to notify them of your travel dates and destinations. This helps avoid fraud alerts or declined charges when you’re trying to make a purchase at sea or in port.
Sea Seeker Tip: Monitor your onboard account daily using the cruise line’s app or guest services. It’s easier to catch a mistake—or rein in your spending—while you’re still onboard.
What’s Included (and What’s Not)
Cruising is often described as “all-inclusive,” but in reality, it’s more of a semi-inclusive experience. Most cruise fares cover your lodging, meals, and entertainment, while extras like drinks, specialty dining, and excursions are added a la carte.
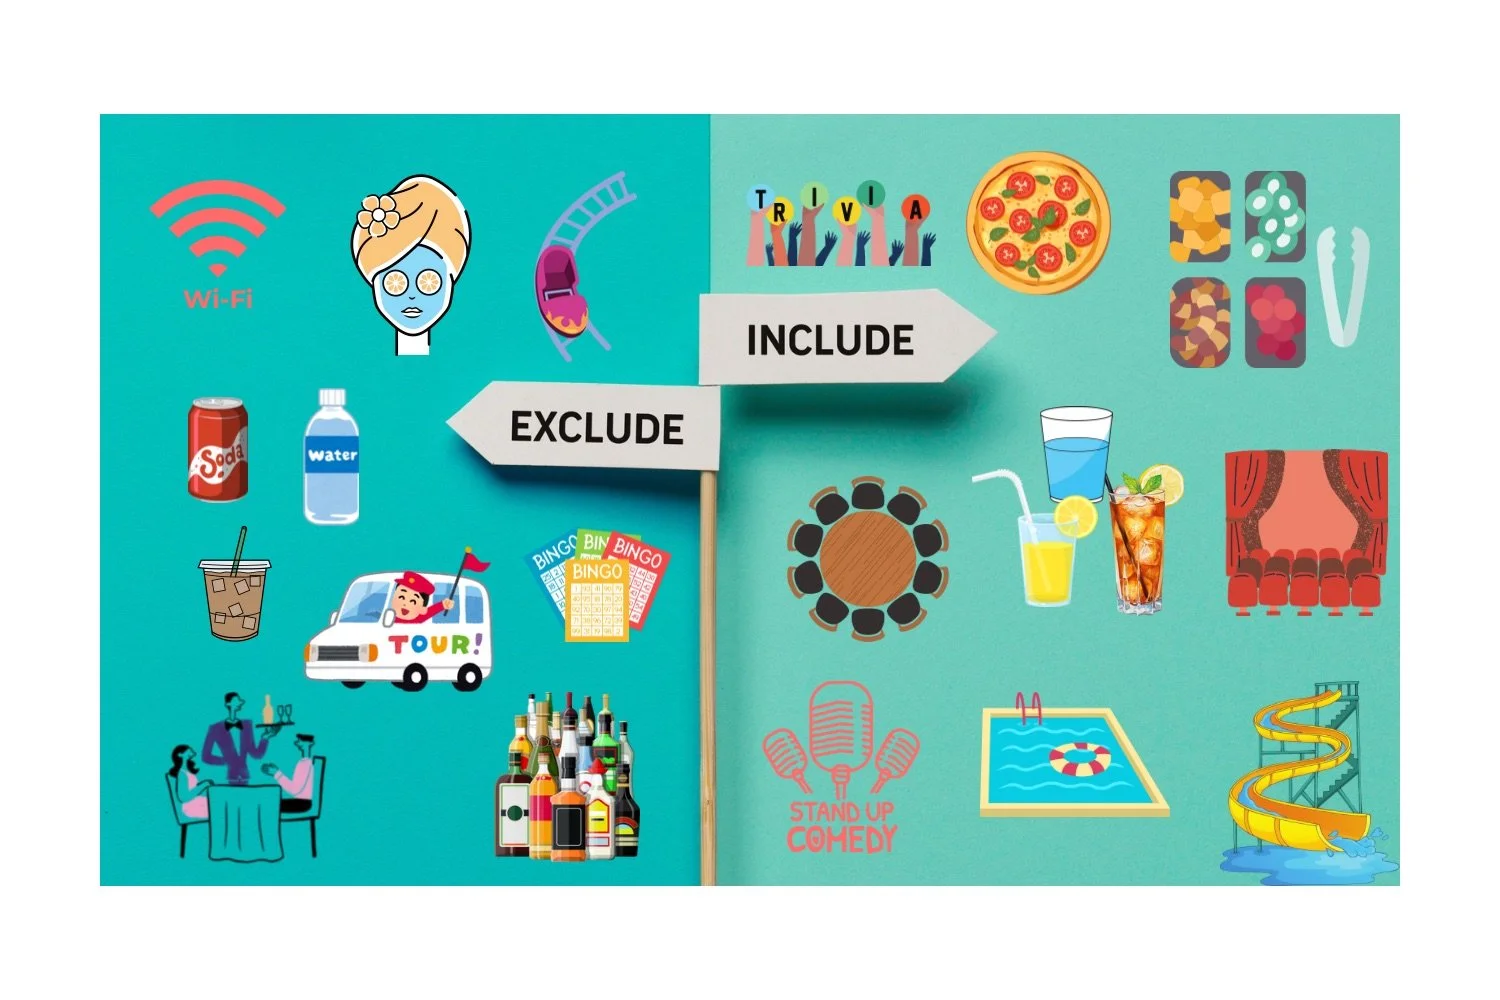
Not everything is included—check what's complimentary vs extra on your cruise to budget smarter.
Here’s a quick breakdown:
Typically Included:
Buffet and main dining room meals
Select casual dining options (like pizza, burgers, salad bars)
Water, iced tea, lemonade, basic coffee
Live shows, theater performances, and most onboard activities
Access to pools, hot tubs, and the fitness center
Not Usually Included:
Alcohol, soda, bottled water, and specialty coffee
Specialty dining restaurants (steakhouse, sushi, etc.)
Shore excursions
Internet/Wi-Fi packages
Spa services and salon treatments
Fitness classes and some onboard workshops
Gratuities (covered in the next section)
In some cases your alcohol drink package may not activate until Day 2 if you’re sailing out of states like Texas or New York due to local laws. Check your cruise line’s policy.
Budget Tip: If you’re planning to enjoy drinks or premium coffee daily, consider purchasing a drink package or beverage plan—and book it before your cruise for better rates.
Important Reminder:
Not all cruise lines include the same amenities. What’s included (and what’s not) can vary widely by cruise line, ship class, fare type, and itinerary. Always double-check the details with your travel advisor or directly with the cruise line before you book so there are no surprises when you get onboard.
Tipping and Gratuities: How It Works

Cruise gratuities are often automatic, but extra tips for exceptional service are always appreciated—know what’s included and what’s not.
Most cruise lines automatically add daily gratuities (also called “service charges”) to your onboard account. These cover the hardworking crew who take care of your cabin and serve you in the dining areas. The typical range is:
$14.50–$17.50 per person, per day, depending on your cruise line and stateroom category
These charges are shared among your room steward, wait staff, and behind-the-scenes crew, so you don’t need to tip individually unless you choose to.
You can:
Prepay gratuities when booking your cruise
Have them automatically added to your onboard account daily
Adjust or remove them at guest services on some cruise lines (note: not all allow this)
Extra cash tips are always appreciated for exceptional service—think porters that help carry your luggage, bartenders who remember your order or a steward who brings extra pillows without being asked.
Drink Packages & Prepaid Gratuities:
Read the fine print when purchasing drink packages. Many cruise lines automatically add an 18% service charge (tip) to the package price at checkout. That means your gratuity for those drinks is already prepaid—even if it’s not immediately obvious.
Some travelers unknowingly tip again at the bar, not realizing they’ve already covered it. When in doubt, check your receipt or ask. And remember: this varies by cruise line, so be sure to confirm the gratuity policy ahead of time.
Smart Cruise Budgeting Tips
Even with all the included perks, extras can add up quickly if you’re not paying attention. Here’s how to cruise smart:
Set a daily budget for extras like drinks, souvenirs, and excursions
Use onboard credits wisely—many cruise bookings come with perks like “$100 onboard credit,” which can be applied to purchases
Watch out for “gotchas” like $4 bottles of water or $20 spa “tours” that turn into sales pitches
Use a travel rewards credit card to earn points or get protections on cruise purchases
Sea Seeker Tip: Keep a small cruise budget planner in your travel binder—or use the budgeting pages in our Cruise Essentials Toolkit to track what you spend at sea and in port.
At Sea – Sea Days and Onboard Life
Sea days are one of the most unique and relaxing parts of cruising. There’s no port to rush off to, no lines to reboard—just endless blue views and time to enjoy the ship at your own pace. Whether you want to be poolside with a book or jumping into activities, here’s what sea days really feel like.

Sea days are made for Lido Deck lounging—soak up the sun, swim, and enjoy laid-back vibes between port adventures.
What a Sea Day Is (and Isn’t)
A sea day is simply a day spent cruising between ports with no land stops. It’s your chance to soak in the full cruise ship experience—and you’ll usually have at least one or two on a typical 7-day itinerary.
What it is:
A chance to sleep in, sip coffee on your balcony, or explore the ship
A full day of onboard activities and entertainment
A great time to book spa treatments, read, or enjoy long meals
What it’s not:
A port day with excursions
A time when the ship is empty—sea days can be busy on deck!
Sea Seeker Tip: Want peace and quiet? Head to the adults-only sun deck early, find a hidden lounge, or duck into the library or observation area after lunch when the pool decks fill up.
Entertainment and Activities Onboard
There’s never a dull moment on a cruise ship unless you want one. Your daily schedule (often called the “Daily Planner” or “Fun Times”) is packed with options, including:

Tip: For specialty events like escape rooms or wine tastings, make reservations early—they fill up fast.
Trivia contests, bingo, or game shows
Live music, dance classes, karaoke, and cooking demos
Spa appointments, salon treatments, or thermal suite access
Fitness classes like yoga, Zumba, or stretching sessions
Lectures or enrichment talks, especially on longer or more destination-focused cruises
Evening Entertainment: Most ships feature Broadway-style shows, comedians, musicians, or themed parties in the evenings—typically at two showtimes (early and late) to accommodate both dinner seatings.
Dining at Sea: Buffet, Dining Room, and Beyond
When you’re not relaxing or exploring, you’re likely eating—and cruise ships are known for delivering big on food variety.
Main Dining Room (MDR):
Serves a multi-course dinner each night (and often lunch or sea day brunch). You’ll either have:
Traditional dining with a set time and table, or
Flexible dining where you eat when you choose
Buffet & Casual Spots:
Open for all meals and snacks, the buffet is a favorite for first-timers. You’ll also find poolside grills, pizza counters, coffee shops, and dessert stations.

Treat yourself to a specialty dining experience—like this sushi boat—available on many cruise lines for an elevated, à la carte meal option.
Specialty Dining:
Optional, extra-fee restaurants like steakhouses, sushi bars, Italian bistros, or chef’s table experiences.
Sea Seeker Tip: Use your sea days to try new venues—sea day brunch is a fan favorite on many lines. And don’t skip afternoon tea if it’s offered!
Finding Your Flow: Chill or Explore
The beauty of a sea day is that it’s 100% customizable. Want a quiet day with a good book and a nap in the sun? Perfect. Want to try every trivia game, wine tasting, and water slide? You can do that too.
Low-key ideas:
Lounging with ocean views
Reading, journaling, or meditating
Spa day or thermal suite access
Napping in the shade (it’s a cruise rite of passage!)

Sea days are perfect for poolside lounging—arrive early to grab your favorite deck chair!

Try your hand at mini golf during your cruise—it’s one of many fun onboard activities included in your fare.
More active options:
Pool deck contests and games
Sports courts, mini golf, ropes courses
Art auctions, cooking demos, or mixology classes
Behind-the-scenes ship tours (sometimes offered on longer sailings)
Sea Seeker Tip: Sea days are perfect for discovering hidden gems on your ship—like quiet lounges, tucked-away bars, or serene viewing areas most people don’t stumble upon until Day 6.
Port Days – Getting Off and Exploring

Docked and ready for adventure—port days offer excursions, shopping, and local culture.
Your ship has pulled into port, and now it’s time to trade ocean views for cobblestone streets, white-sand beaches, or jungle adventures. But before you grab your beach bag and go, here’s exactly how port days work and how to make the most of your time ashore.
Disembarking at Port: The Basics
When your ship docks, the crew will announce when passengers can begin heading ashore. Sometimes it’s immediate (docked at a pier), and other times you’ll use a tender boat (a smaller boat that ferries you to shore if the port has no dock).
How to know when it’s your turn:
Listen for announcements or check the cruise app for your port’s disembarkation procedures.
If you booked a cruise-sponsored excursion, you’ll often be assigned a meeting point and time.
If you’re exploring independently, wait for the “all-clear” to disembark—usually within 30–45 minutes of docking.
Don’t forget:
Take your cruise card (ID) and a valid government-issued photo ID if required. Most ports require both to reboard.
Shore Excursions: Booked vs. DIY
There are two main ways to experience port days: cruise-sponsored excursions or independent exploring.
Cruise-sponsored excursions:
Organized and timed by the cruise line
Instructions are printed on your excursion ticket, including your meeting time and location
Sometimes you’ll be escorted off the ship with your group, while other times you’ll need to meet your guide at a designated area ashore
Look for excursion signs and staff holding tour number signs just past the gangway
The ship will wait for you if your tour runs late (a major benefit of booking through the cruise line)
Ideal for activities like ziplining, snorkeling, catamaran cruises, or guided cultural tours
Sea Seeker Tip: Always double-check your excursion ticket the night before and give yourself extra time to find the meeting point—some ports are larger and busier than expected.
Independent exploring:
Often more flexible and affordable
Gives you the freedom to wander, shop, eat local, or hit the beach at your own pace
You are responsible for returning to the ship on time—the ship will not wait for latecomers on DIY outings
Sea Seeker Tip: Not sure what to do? Check out our Cruise Port Excursion Planner – Expanded Edition, which includes research pages, packing tips, and budget sheets for popular Caribbean ports like Cozumel, Costa Maya, and Roatán.
Packing a Smart Port Day Bag
Port days can last 6–8 hours depending on the itinerary, and while many cruise lines allow passengers to come and go freely while the ship is docked, you won’t have access to your stateroom if you’re off on an excursion—especially those that travel away from the port area.

Pack reef-safe sunscreen to protect marine life—some ports require it by law.
That’s why it’s smart to bring everything you’ll need for the day with you, especially if your tour includes beaches, boats, or buses. Here’s what to bring ashore in your day bag:
Photo ID + Cruise Card
Printed excursion confirmations or tickets
Port map (cruise line or tourism kiosk)
Sunscreen, sunglasses, and a hat
Reusable water bottle
Beach towel (available onboard)
Light snacks or gum
Waterproof phone pouch or dry bag
Cash (especially small bills for tips or taxis)
Credit/debit card for larger purchases
Emergency contact info (cruise line and U.S. embassy)
Bring reef-safe sunscreen—some ports and excursion operators only allow reef-safe formulas to protect marine life.
Pack a mini first-aid kit with Band-Aids, motion sickness remedies, and basic meds. These are pricey onboard and limited in port shops.
Cruise-Smart Tip: If you’re going to the beach or doing water activities, pack a change of clothes, swim cover-up, and plastic bag for wet items.
Getting Back to the Ship on Time
This part is no joke: cruise ships operate on a strict schedule, and if you’re not back by the posted onboard time, the ship will leave without you—and it’s up to you to get to the next port (on your own dime).
You’ll be informed of your “all aboard” or “back on ship” time in your daily planner, onboard announcements, and the cruise line’s app. But here’s where it can get tricky:

Time matters in port—always allow a buffer to get back to the ship before all-aboard time to avoid getting left behind.
Ship Time vs. Port Time
Cruise ships run on “ship time”, which doesn’t always match the local port time. The difference can be an hour or more depending on time zones and whether the ship changes clocks during the itinerary.
If you’re on a cruise-sponsored excursion, the tour company is contractually responsible for getting your group back to the ship on time as long as you stay with the group and follow the schedule. However, it’s still your responsibility to return to the ship on time.
For example:
If you wander off after the tour to shop or grab a drink and lose track of time—you’re on your own.
If you miss the designated pickup because you didn’t return to the meeting spot after the excursion—it’s up to you to find your way back to port.
Even with a booked tour, you must be back onboard before the posted “all aboard” time. Cruise lines will not delay departure for individual passengers who miss the return from free time.
Sea Seeker Tip: Whether you’re on a tour or not, always stay aware of ship time, review your return instructions, and set an alarm. It’s much more relaxing to be early onboard with a sunset cocktail than rushing back with your heart pounding.
Tips for Staying on Ship Time
Smartphones and digital watches often auto-adjust to local time, which can create confusion. Here’s how to prevent that:
iPhone Users:
Go to Settings > General > Date & Time
Toggle off “Set Automatically”
Manually set your phone to match ship time before disembarking
Apple Watch Users:
Add a world clock complication to your watch face
Set it to your ship’s time zone so you can track ship time alongside local time
Android Users:
Go to Settings > System > Date & Time
Toggle off “Automatic date & time”
Manually set the time to match ship time
(Note: steps may vary slightly depending on your device or Android version)
Bonus Tip: Bring a simple analog watch and manually set it to ship time when you board. It won’t auto-change, and you can rely on it without worrying about settings.
Sea Seeker Tip: Always aim to return to the ship 30–45 minutes before the all-aboard time, just to be safe. That last call horn? It’s not a suggestion.
Supporting Local Businesses
One of the best parts of cruising is visiting new cultures and communities. Whether you’re buying handmade jewelry, enjoying a beachside lunch, or taking a guided tour—choose local when you can.

Nassau’s famous Straw Market is a hotspot for souvenirs—but keep an eye out for tourist pricing.
Look for:
Artisans selling handmade goods
Local eateries or family-run snack stands
Private guides for cultural walking tours
Community-based excursions or cooperatives
Sea Seeker Tip: Learn a few basic words in the local language—it goes a long way with vendors and tour guides.
Staying Safe in Port: Scams, Fraud and Pickpockets
Cruise ports are wonderful gateways to local culture, food, and adventure—but like any popular tourist destination, they can also attract opportunists. With a little awareness and a few smart precautions, you can explore with confidence and avoid common pitfalls.
Common Cruise Port Scams & Risks:
Overpriced taxis or “fake tour guides” offering too-good-to-be-true deals outside the terminal
Credit card skimming or tampered ATMs
Distraction techniques (like someone bumping into you or trying to hand you something) used by pickpockets
Bracelet or “free gift” scams where someone ties something to your wrist or bag, then demands payment
Over-aggressive vendors who pressure you into buying, especially in high-traffic areas

Stay smart in port—use a money belt, carry travel insurance, and avoid ATM and Wi-Fi scams.
How to Protect Yourself:
Leave valuables on the ship. Bring only what you need: one credit card, a copy of your ID (or passport if required), some cash, and your cruise card.
Wear a crossbody bag or money belt and keep it zipped and in front of you. Avoid backpacks or loose purses in crowded areas.
Use a dummy wallet with a small amount of cash to divert attention from your real one.
Stay alert near ATMs and only use machines in reputable, well-lit areas (like banks or large retailers).
Trust your gut. If something feels off or someone’s being too pushy, politely walk away.
Be wary of street games or overly friendly strangers—they may be setting up a distraction.
Card Tip: Use tap-to-pay where available and enable transaction alerts through your banking app to monitor charges in real time.
Travel Tip: Stick to well-reviewed vendors and shops, especially when booking excursions or making larger purchases. If in doubt, head back to the ship or ask a crew member for port-specific advice.
Sea Seeker Tip: Cruise ports are generally safe, especially in the main tourist zones, but it never hurts to be cruise-smart. A little caution can go a long way toward keeping your day carefree and enjoyable.
Disembarkation Day – How It Works and What to Expect
All good cruises must come to an end—but disembarkation day doesn’t have to be chaotic. With a little prep and a clear understanding of how the process works, you can end your vacation on a calm, organized note (and maybe even start dreaming about your next one).

Disembarkation might mean goodbye for now—but the memories (and tan lines) stay with you!
When It Happens and How It’s Organized
Disembarkation typically begins early on the final morning—usually between 7:00–8:30 AM. You’ll be assigned a group or “zone” based on your stateroom, luggage method, or flight departure time.
The day before you return to port, your stateroom steward or cruise line will provide detailed disembarkation info, including:
Your assigned disembarkation time
Luggage tags if you’re not self-carrying
Instructions for settling your account
Customs and immigration reminders
Sea Seeker Tip: Review this paperwork carefully and don’t wait until morning to get organized.
Options: Self-Assist vs. Luggage Pickup
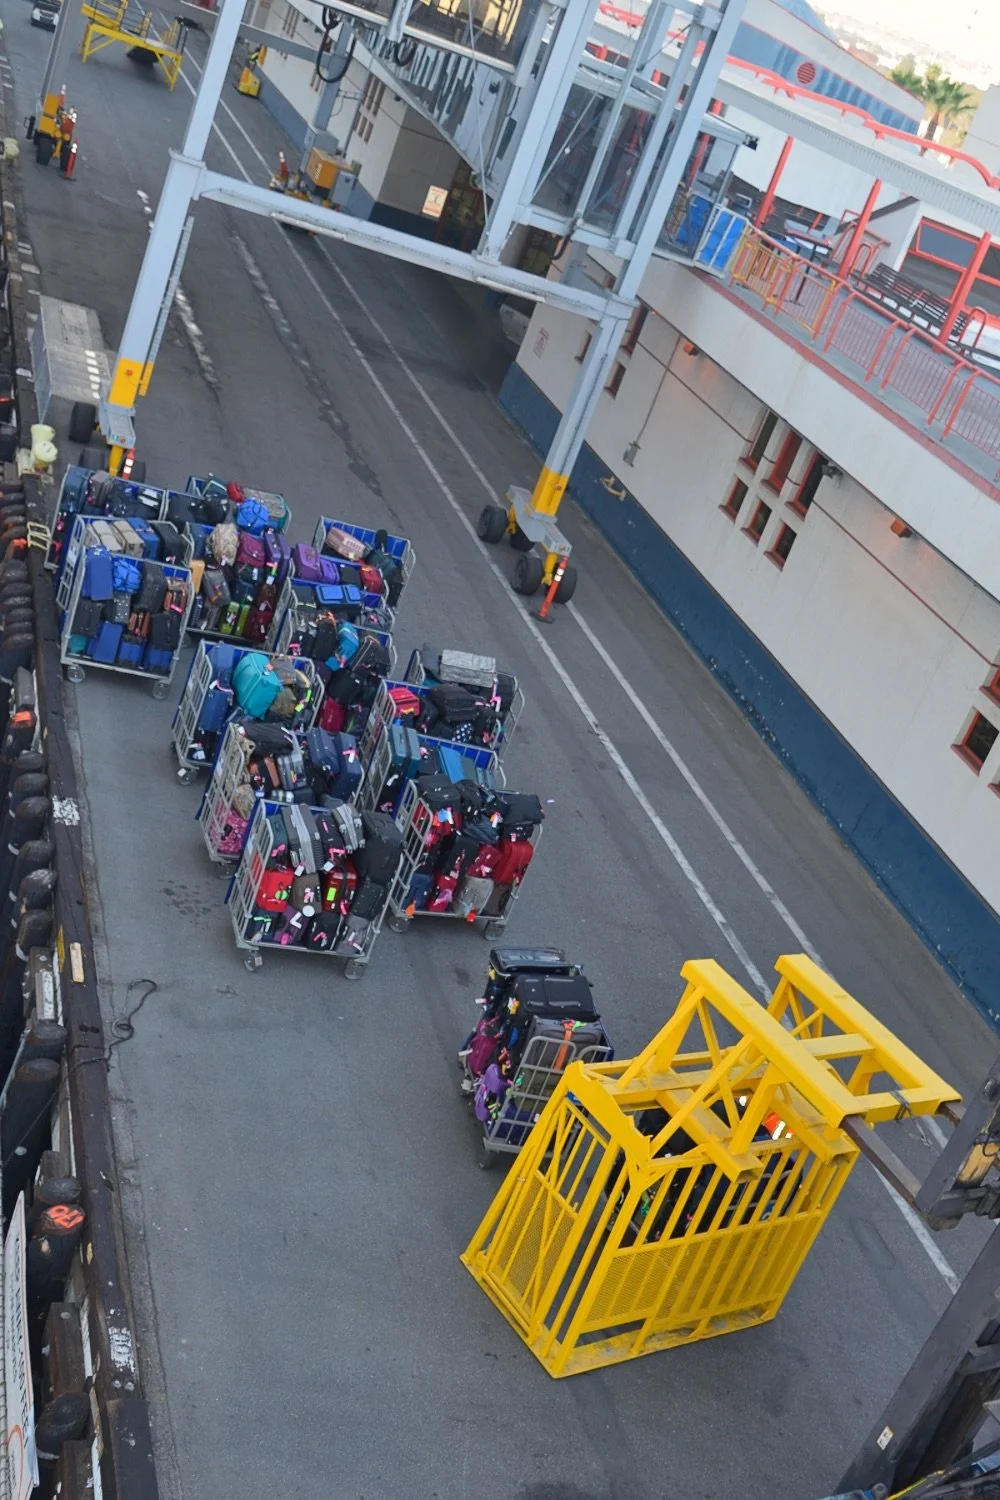
Your checked bags are handled behind the scenes—use luggage tags and carry on essentials.
You can choose from two common disembarkation methods:
Self-Assist:
You carry all your own luggage off the ship
Typically among the first passengers allowed to disembark
Ideal for early flights or travelers who prefer full control
Luggage Pickup:
Tag and place your suitcases outside your cabin door the night before (usually by 10 PM)
Crew delivers your luggage to the terminal for pickup
Be sure to keep a carry-on bag for clothes, documents, and personal essentials
Packing Tip: Do a final sweep of your stateroom—check drawers, under the bed, behind the bathroom door. Once you leave the ship, you can’t go back to retrieve forgotten items.
Final Onboard Charges and Settling Your Bill
The night before disembarkation, the cruise line will close out your onboard account and send a final statement.
Review your charges carefully before going to bed:
It’s much easier to dispute any errors or ask questions at Guest Services while you’re still onboard.
Wait until the morning, and you may face long lines—or lose your chance entirely once you’ve disembarked.
Debit Card Reminder: If you used a debit card, remember that holds placed on your account may remain for several days after the cruise, even after charges are finalized.
Alcohol Purchases and Duty-Free Items

Buying alcohol or souvenirs onboard? Know what to declare and what taxes may apply after your cruise.
If you purchased alcohol onboard or in port, you likely won’t receive it right away.
Most cruise lines hold alcohol purchases until the morning of disembarkation:
This applies to bottles bought from duty-free shops on the ship or brought back from port
You can still enjoy cocktails and drinks onboard—this only affects bottles purchased to take home
Sea Seeker Tip: Your held items will typically be delivered to your stateroom the night before or available for pickup in the terminal. Hang onto your receipts just in case.
Clearing Customs and Immigration
As you leave the ship, you’ll go through U.S. Customs and Border Protection—especially important on international itineraries.
Passports vs. Birth Certificate + ID:
If you’re traveling with a passport, the process is often faster and more streamlined
If you’re on a closed-loop cruise (leaving from and returning to the same U.S. port) and using a birth certificate + photo ID, expect longer customs lines and processing times
Taxes & Declarations:
Be ready to declare any goods you purchased during your cruise:
You may be required to pay tax or duty on items like alcohol, tobacco, or high-value souvenirs
Fill out your customs declaration form honestly—CBP officers may ask for receipts or inspect bags
Sea Seeker Tip: Use a notes app or a small log to keep track of what you buy in each port—it makes filling out customs forms a breeze.
Getting Home or to Your Next Stop

Departing the cruise terminal waiting for a shuttle.
Once you clear customs, you’re officially back on land! Whether you’re catching a flight, meeting a shuttle, or spending an extra night nearby:
Build in buffer time between disembarkation and airport check-in—2 to 4 hours is ideal
If you’re staying in the city, request early luggage drop-off or a late hotel check-in
Some ports offer luggage storage services if you’re sightseeing before heading home
One Last Look and the Post-Cruise Glow
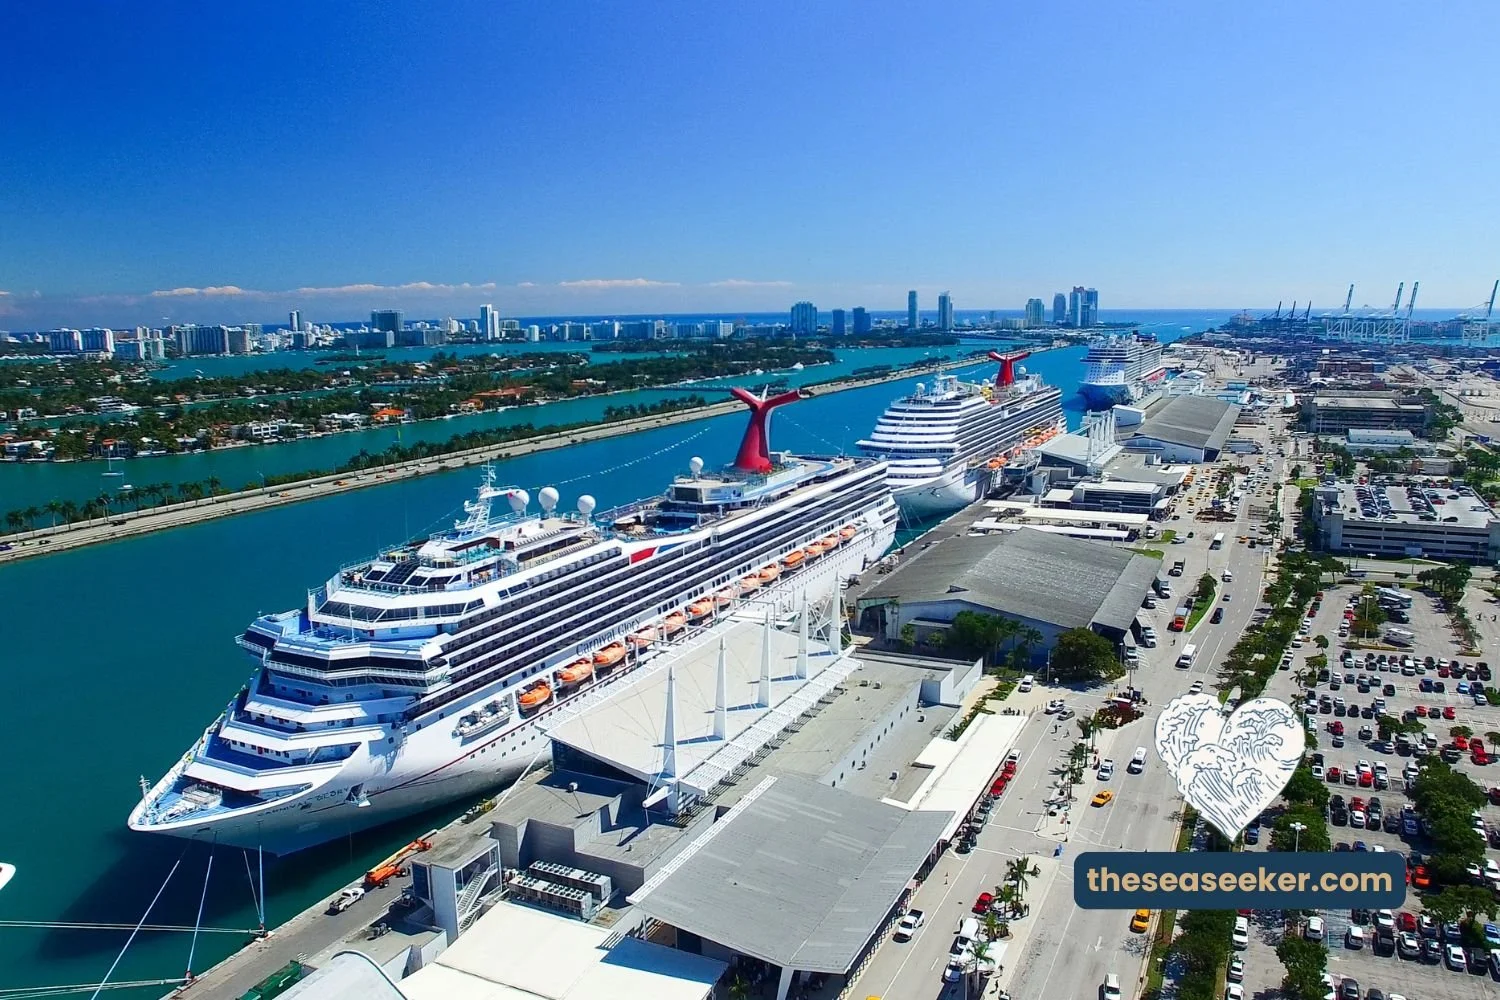
PortMiami is one of the busiest cruise terminals in the world—get there early, follow the signs, and let your vacation begin.
Before walking out that stateroom door for the last time:
Do a final check of the room, safe, and bathroom
Take your keycard and photo ID with you for customs
Snap one last photo of the view—you earned it
After your cruise:
Watch for post-cruise surveys and photo downloads
Leave a review for standout crew members
And if you’re anything like most cruisers—start looking at your next itinerary before you unpack your suitcase
Ready to Cruise Smarter?
If this guide helped you feel more confident about your first cruise, we’ve got even more where that came from.
Subscribe to our free newsletter for insider cruise tips, destination spotlights, and packing hacks straight to your inbox.
Or, keep the planning going and check out our next read:
{7-Day Cruise Outfit Planner for Women 40+ }
Because cruising should feel easy, exciting, and just a little luxurious—every time.
Let’s keep sailing smarter together.
— The Sea Seeker